Paper Weave Picture
Posted on 03/31/20
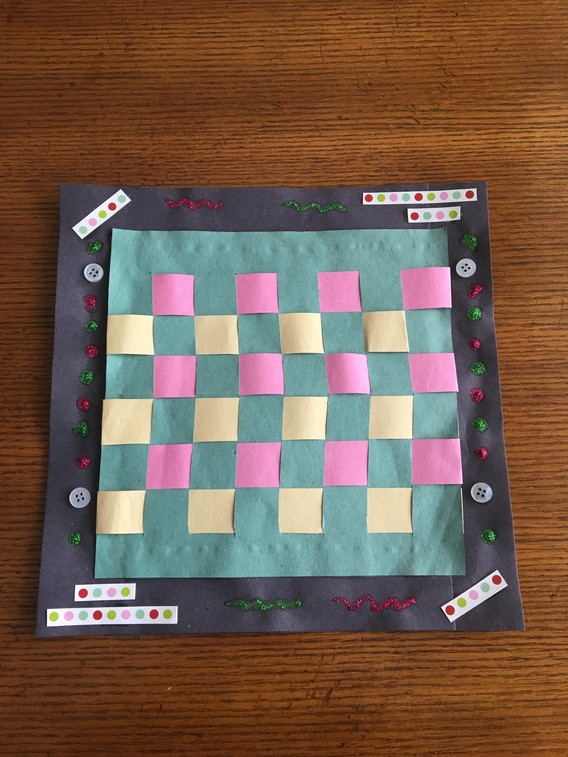
Create an easy paper weave picture. Kids can learn how to apply color concepts like primary colors, monochromatic colors or complementary colors.
STEPS:
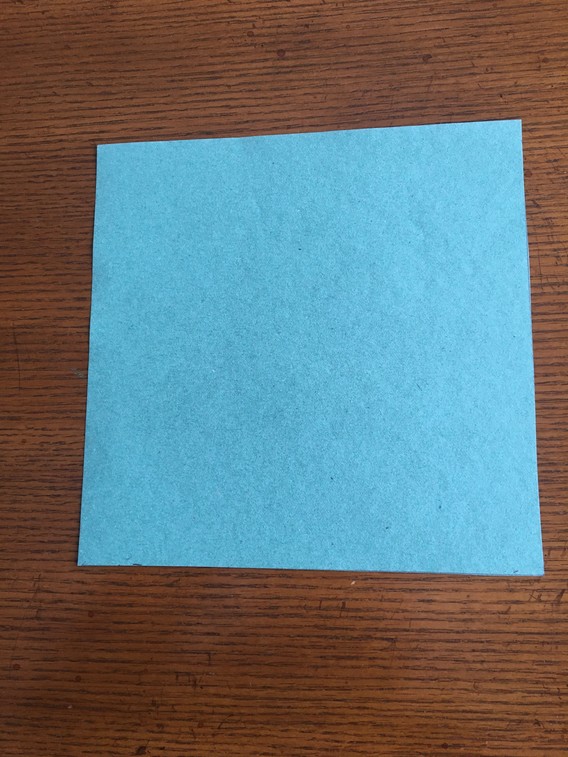
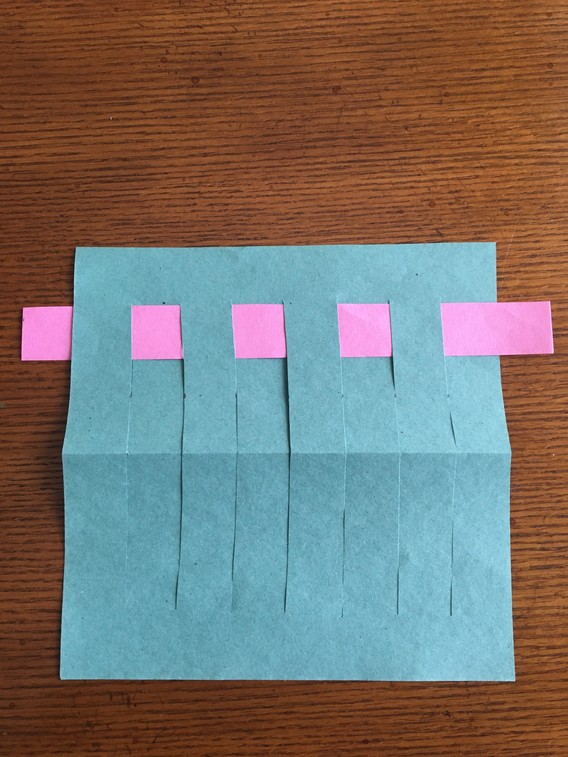
Cut paper into an 8-in square.
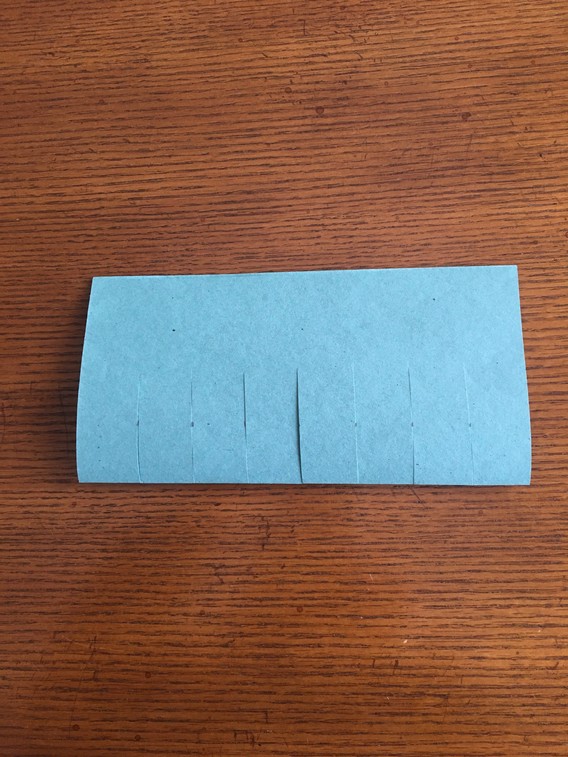
Fold the paper in half
Cut evenly-spaced slits about 1-inch wide starting from the folded edge and stopping about 1 inch from the opposite edge. For younger children, drawing a vertical line as a cutting guide can be helpful.
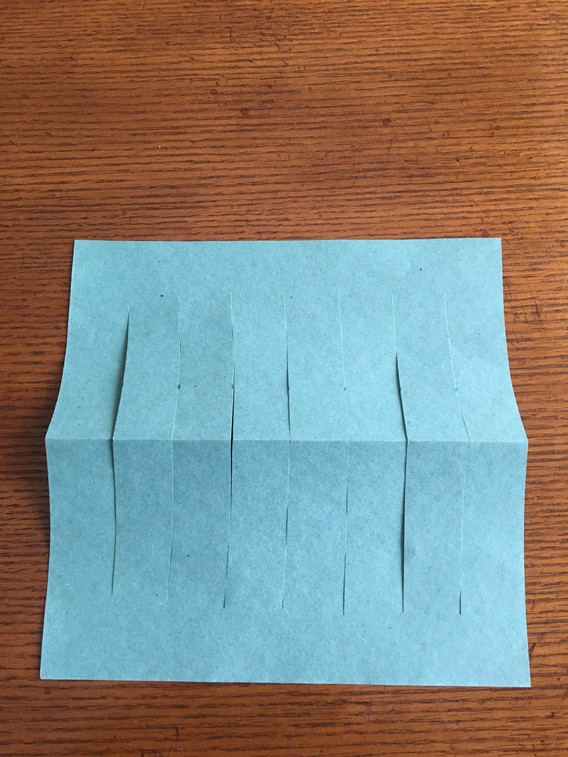
Gently unfold the paper.
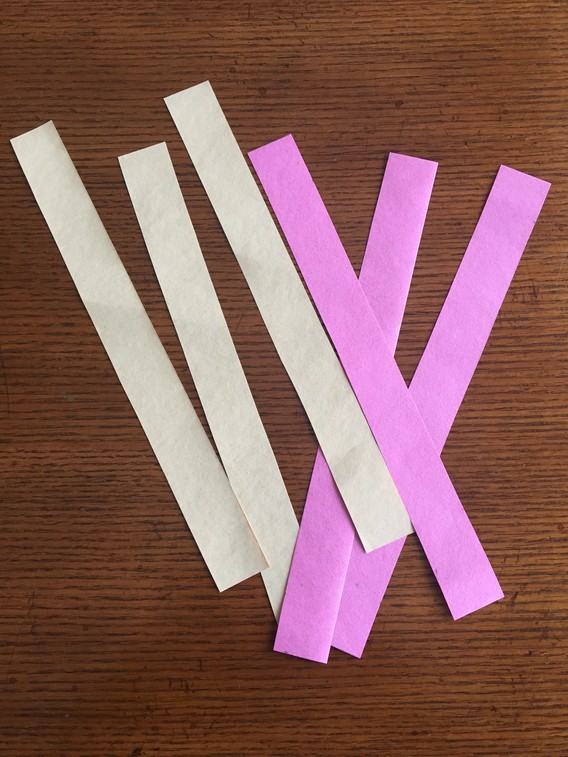
Cut strips of colored paper 1 inch wide and 10 inches long. The strips must be longer that the length of your square’s side.
Take one paper strip and weave it across the slits, going over and under the slits.
Move the woven strip to the top and start with the next one. Weave the second strip in an opposite pattern as the first. If your first strip went over and under the slits, the second strip should go under and over the slits.
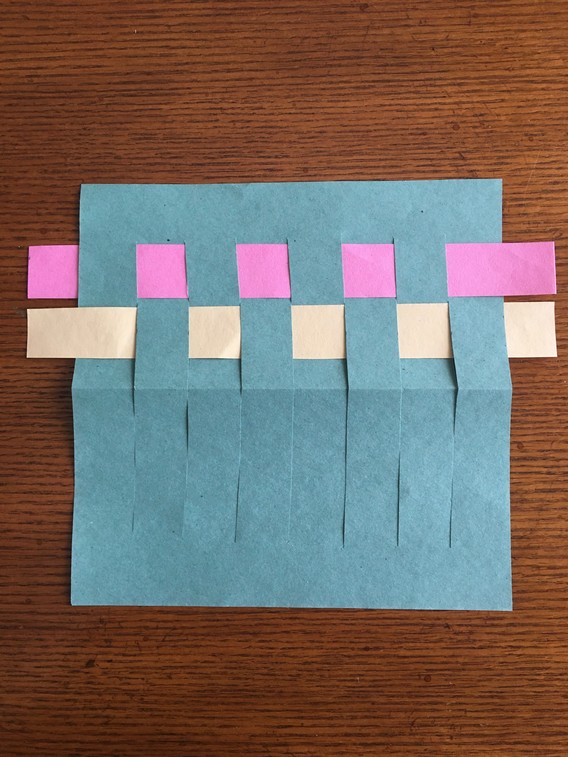
Continue to weave more strips in an alternating pattern until you get to the bottom of the slits and your square is full.
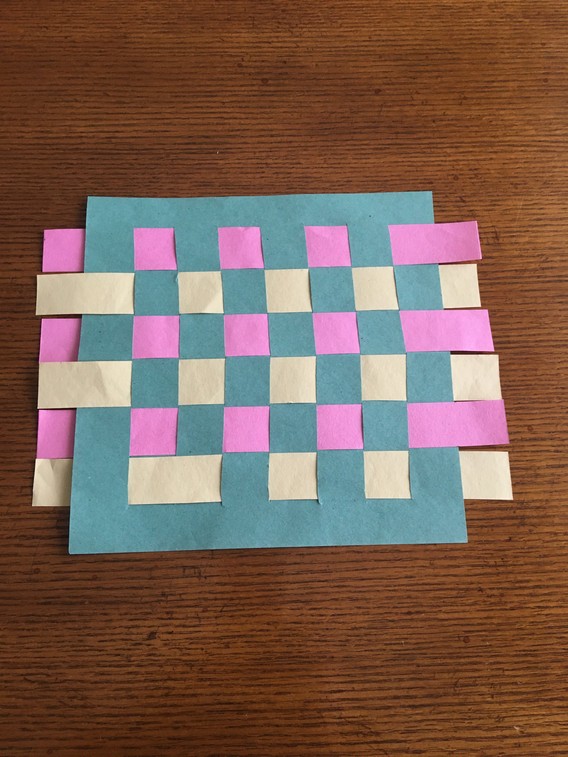
Flip the paper square so that the back is now facing up. Apply glue at the ends of each paper strip.
Fold the ends of each strip over the edges of the paper square or over the slits. Press to glue in place.
Flip the woven square again so the folded ends are concealed at the bottom.
To make a frame for your paper weave, cut a larger piece of construction paper. You can use a pair of paper edging scissors to create a wavy-edged frame. Glue your paper weave at the center of the frame.
The frame can be decorated with ribbons, puffy paints, buttons, glitter glue, beads and any other trimmings.
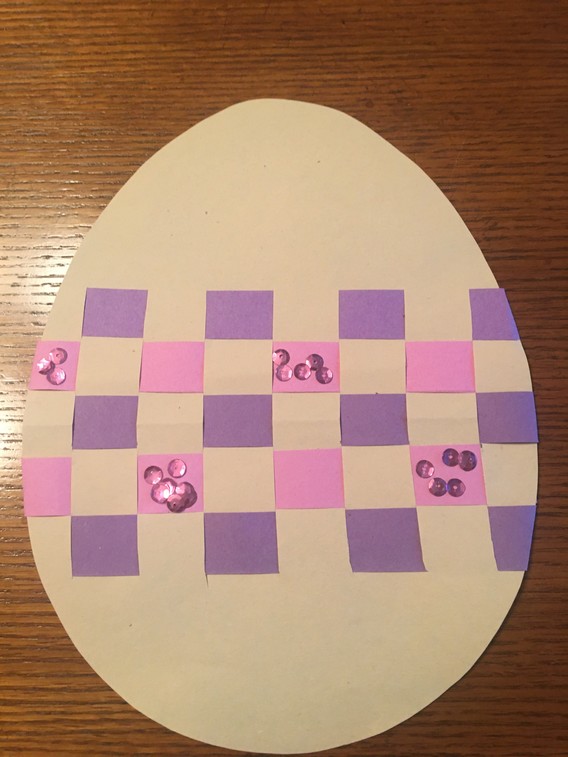
Have fun creating themed weaves and unique frames. Weave an egg shape or basket for a spring theme!